In a time of global uncertainty fueled by the COVID-19 Virus, many have resorted to working from home. Working from home comes with its quirks and challenges especially with regards to enterprise digital security, however, in the midst of these challenges constant communication is an essential aspect of both personal, business, and religious life, to fill the void popular video conferencing "Zoom" too skyrocketed to the top of most wanted software for communication. The impact was immense that it spurred Microsoft to develop "Skype Meet Now", expectedly being the top video conferencing tool that comes with its attendant security issues much of which has been fixed in the latest version of Zoom.

Open Broadcasting Software commonly called OBS is a Free and open-source software for video recording and live streaming. For more info visit the link here.
With that introduction out of the way, you are probably wondering how best to use OBS and Zoom for Live Streaming, for some people they do not have to use this setup since Zoom can Live Stream either to Youtube or Facebook but not both simultaneously, same goes for OBS but due to its advanced features it does way more than Zoom ever could.
Possible Reasons for using OBS and Zoom includes but is not limited to:
- Dedicated Software Encoder
- Adding Overlays and other graphics
- Multistreaming Capabilities
- Multicamera setup
- Video Switching
- Recording Video or audio in various formats
- FFMPEG Custom Recording.
In Live Streaming, the major concern is often with audio and Internet Bandwidth (upload speed), the latter can be managed by discussing with the Internet Service Provider (ISP) or using a Local Area Network (LAN) Cable as opposed to using Wireless Fidelity (WiFi) Network, while the former can be fixed in multiple ways such as directly from the camera, or using a USB audio interface such as Focusrite Scarlett 2i2, or the method this article will focus on; using a virtual audio cable.
Using Zoom is straightforward, however, when we need some form of control or the ability to live stream via OBS then additional setup is required.
Step 1 - Install a Virtual Audio Cable
Download a Virtual Audio Cable, link provided. Extract the zip file and install the VBCABLE_Setup_x64.exe for 64-bit Operating System or the VBCABLE_Setup.exe for 32-bit Operating System, preferably as an administrator and restart the computer for the new application to be registered properly.
Step 2 - Configure Zoom Audio
Login to your Zoom Account, Click on the Settings Cog
In the Settings select the Audio Tab, there you are presented with a Speaker and Microphone setup. For the Microphone if you will participate in the Zoom Call you can set to Same as System, Microphone, or a custom mic if you use any; personally, I do not use my microphone so it is set on a Cable Output, while for the speaker it is set to Cable Input.
Also very important is to always set up the audio to automatically join audio by computer and never mute your microphone as this would affect the next step.
Step 2.2 - Configure Zoom Video
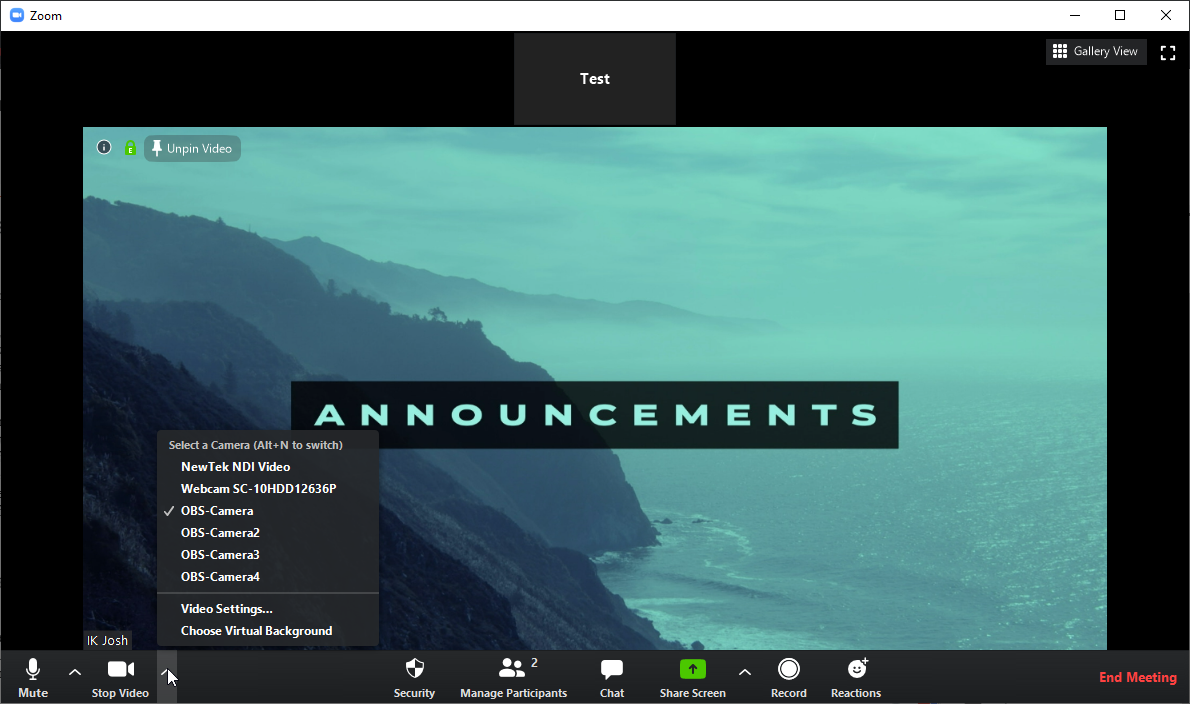
This part is only necessary if you want Zoom Participants to see OBS output, this output cannot be the main spotlight, to enable OBS to output to Zoom, you need to install a plugin for OBS called OBS Virtual Camera link to download is here, if you use OBS below version 25 please use this link. When installing you are presented with 1- 4 virtual cameras; personally, I choose to install 4 and the installation is straightforward. Once that is complete, switch to Zoom, selecting settings, then video tab, and under settings choose an OBS Camera by default the first camera will be selected on OBS.
Start a test Zoom Meeting.
Note: do not spotlight OBS output on Zoom, it will lead to a loop.
Step 3 - Configure OBS
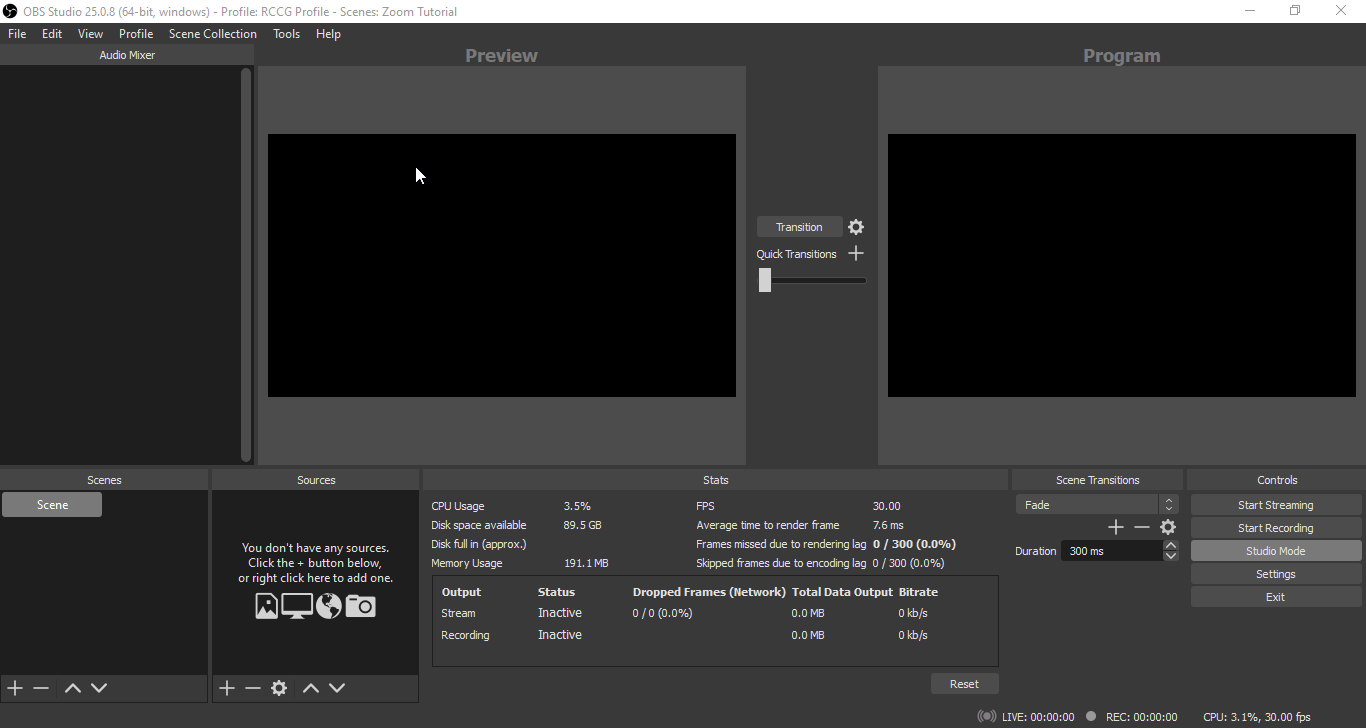
With Zoom configured, the last step will be on OBS itself,
1) Create a Scene
2) Add Zoom Video Source to the Scene
Select Windows Capture, rename to e.g "Zoom Camera"
Under Windows select Zoom, there will be two options, select the one with the meeting information.
Very often under Capture Method, the correct image doesn't show up, so change it from "Automatic" to "Windows Graphics Capture", note this option works only for Windows 10 v1903 and above. Click OK and then resize the windows as needed.
3) Add Zoom Audio Source to the Scene
Select Audio Output Capture, rename to e.g "Zoom Audio"
By default, it is set to default, but what we want is to capture the audio from Zoom in Step 2.1 which is Cable Input.
Lock the Audio and Video source in place then transition to test.
Setup the advanced properties of the Zoom Audio source.
Change from Monitor off to Monitor and Output, this setting allows you to hear the audio and also stream or record it.
Testing
Audio
Allow a user or create a dummy user to connect to the Zoom Meeting, let the user speak, there should be a movement in the Zoom Audio Bar.
Video
To test the video, create a static image source
Next, check if the Virtual Cam is up and running (it should by default), if it isn't working, navigate to Tools -- VirtualCam, select your camera and click start.
Navigate to Zoom meeting and start Video. It should show the static image now, and the video can be pinned
Once the audio and video are connected, click on the Start Streaming button to begin streaming, by this time you must have set up OBS to do streaming.
Recommendation
- In a single PC setup, use an external monitor, push the Zoom meeting to the external monitor, then mouse movement wouldn't be captured when using "Windows Graphics Capture".
- Test your internet using the OBS Auto-Configuration Wizard to know the proper settings for streaming or recording.
- To broadcast to multiple streaming providers such as Facebook, Twitch, Youtube, Periscope, Instagram, Naver, etc. use a restreaming service such as Restream.io, there are multiple restreaming services.
Disclaimer
All links are provided without any affiliation to the aforementioned websites.


Hi, if you are taking audio and video from Zoom to OBS and then back to Zoom, wouldn’t it create a feedback loop when a participant speaks?
ReplyDeleteAlso would it be possible to set your Zoom as active speaker but a co-host sets your screen as spotlight video. Then videos, pictures, speakers will all be shown as full screen for the participants. Would that work?
Hi, there apologies for the late reply.
DeleteFirst, you have to decide how you want your workflow to be, as you rightly stated regarding the feedback loop given the setup demonstrated, generally when people use Zoom and OBS, the idea is to use their OBS as a video switcher and a control box, while Zoom is just receiving the feed from OBS and rebroadcasting to anyone connected on Zoom. In the setup i demonstrated, I am using OBS to broadcast to Facebook, Twitter and YouTube, for the most part I turn off my cam in Zoom.
Yes that would work, however as long as screen isn't being shared by any participants all should be fine, if screen-sharing is enabled, the OBS controller might need to do a bit of work to show the user when screen-share is turned off [this is a PC issue, not sure about Mac]. But if the video, images,slides are being shown from OBS, then you have nothing to worry about.
ReplyDeletePretty great post. I simply stumbled upon your blog and wanted to mention that I have really loved surfing around your blog posts. Great set of tips from the master himself. Excellent ideas. Thanks for Awesome tips Keep it
virtual-audio-cable-crack
roboform-crack
prosoft-data-rescue-pro-crack
ReplyDeletePretty great post. I simply stumbled upon your blog and wanted to mention that I have really loved surfing around your blog posts. Great set of tips from the master himself. Excellent ideas. Thanks for Awesome tips Keep it
virtual-audio-Free Download
roboform-Full Version
prosoft-data-rescue-pro-Serial Key